I was recently charged with a sewing dare
  by Jagoda from FitNottoFit to sew something for myself to wear out of this Ikea Fabric.
  You can see the post here.
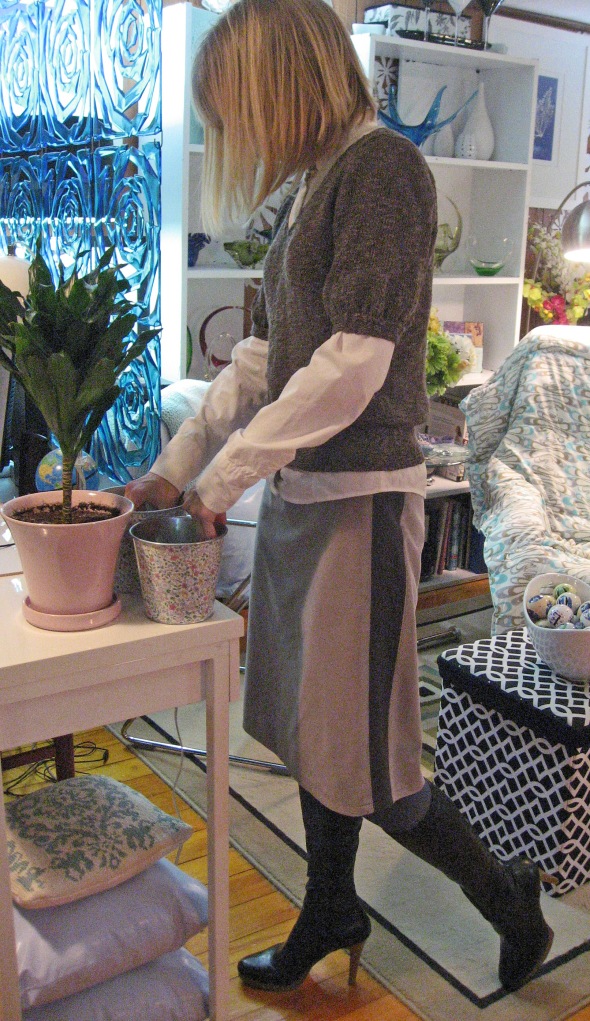
I decided to make a skirt from Butterick B5285.  I made View B, which has two box pleats in the front and back, a back zipper and side seam pockets.
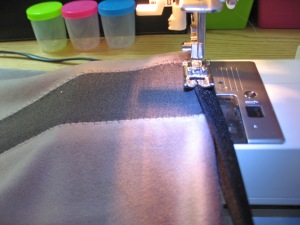
It was quite easy to make, (save for my brand new (to me) vintage overlocker eating my first skirt, both front and back pieces. I had to start all over again. And, the second skirt, the waistband was too big, so I had to make a new one.) The only real difficulty I found was with the box pleats. It took so much time, measuring and ironing them, then lining up the next pleat so that it did not overlap the first one, making sure the pleats were the same size, etc. This actually took longer than constructing the skirt. It was much more challenging to get these box pleats even and flat from top to bottom than it was for knife pleats, like those found in versions C and D. Is there a trick / secret to making box pleats? If you know of one, please share!
 I do really like the way the box pleats layer the fabric and allow the large floral print on it to peek through and make all kinds of abstract and colourful designs on the skirt. I think it really utilized the fabric to its full potential, adds an extra element of design and creates an interesting composition. I am quite pleased with that aspect. And, of course, POCKETS!!!! ‘Nuff said. I submitted it for my skirt project in sewing class and received 20 out of 20 (100%). 🙂
 And, I have seen so many photos of you lovely garment makers twirling in your skirts, so here goes:

 Twirling is THE BEST!!!! And, it really shows the layers of colour and abstract floral patterns underneath the box pleats.

Kitty Likes Measuring Tapes